¶ Common Fault Resolution Procedures
¶ First. Unable to extract the filament
- First, make sure that the consumables have been correctly installed.Reference Filament Load Guide。
- Heat the nozzle to the appropriate temperature for the current consumable (refer to 200°C for PLA, 240°C for PETG, and 255°C for ABS), operate the extrusion on the screen, and check if the extruder is rotating normally.
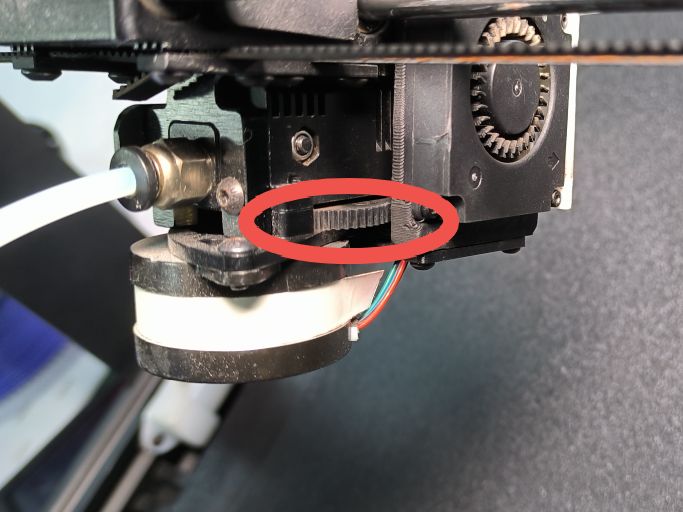
If the extruder cannot rotate properly, first remove the Filament. Next, test whether the extruder can rotate normally. If it still cannot rotate normally, it is necessary to disassemble the extruder to check if there are any consumables stuck in the gears or if there are other faults.Reference IR3V2 Assembly and Disassembly Tool Head Guide. - If it is not caused by the aforementioned reasons, then it is because the nozzle is clogged. Maintain the nozzle in a heated state. First, remove the consumables, unscrew the handle of the extruder, and use a 1.5mm hexagonal wrench (the smallest one in the tool kit) to insert it into the feed port until the nozzle ejects the filament. Reference Guide to Clearing nozzle.
- After performing the above operations, if the filament still cannot be extruded, continue to heat the nozzle and use the Nozzle Cleaning Needle in the tool kit to insert into the nozzle opening and move it back and forth to clear the blockage. Try to squeeze again. If the filament still cannot be extruded, then the nozzle needs to be replaced. refer to the Nozzle replacement Guide
¶ Second.Printing process auto paused
- During the printing process, there was a pause and a prompt indicated that there was no filament. First, check if the filament has been used up or is stuck.
- Heat the nozzle to the appropriate temperature for the current filament, operate the extruder to extrude the material, observe whether the outflow is smooth. If the normal outflow is not achieved, refer to the Guide to Clearing nozzle.
- If the filament can be extruded normally, check whether there are any sparse or missing materials on the outer wall of the printed part of the model. If so, increase the nozzle temperature and try printing again.
- If none of the above situations occur, continue to extrude the filament. While extruding, observe whether the filament motion sensor flashes.
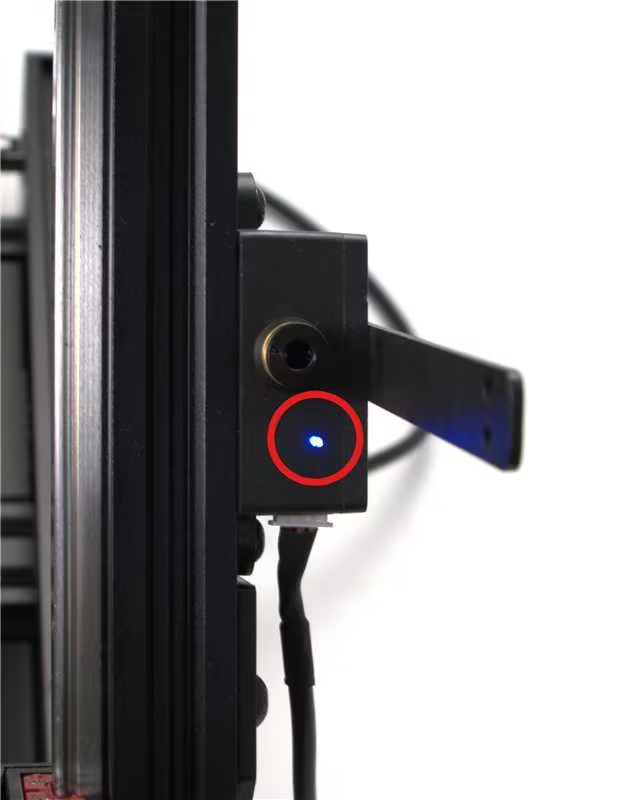
If there is no flashing light, first check whether the feeding detection line is properly connected or if the wiring terminals are loose.
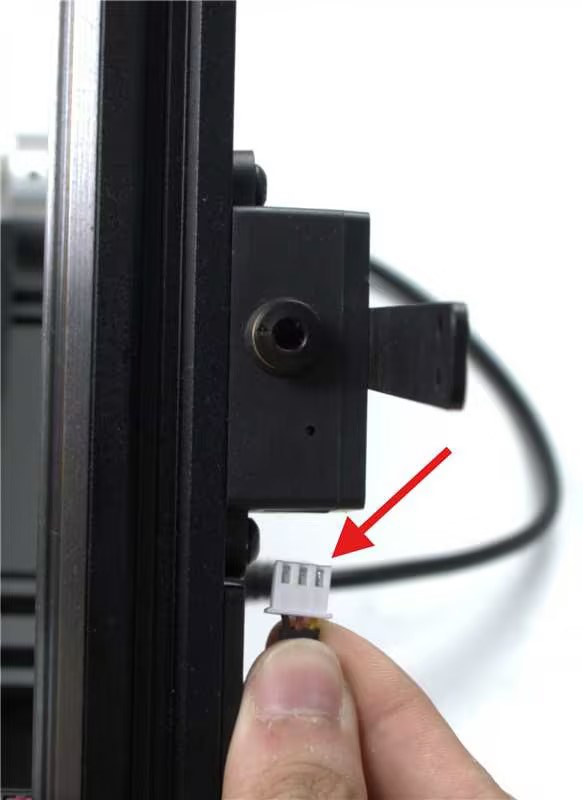
If it is confirmed that the wiring is normal, then it means the circuit board is damaged and needs to be replaced.
¶ Third.Print layer shift
-
Check if the printed model has any issues such as being suspended or not properly adhered. If the problem is caused by the model, it is necessary to re-slice and add supports. Reference IdeaMaker Basic operations and add support guide.
-
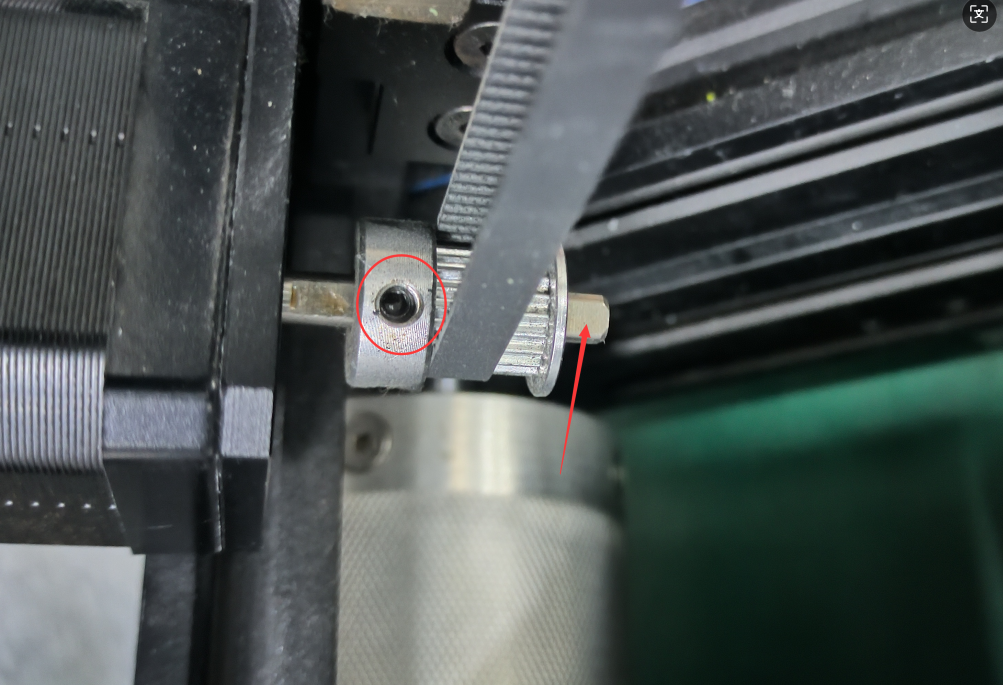
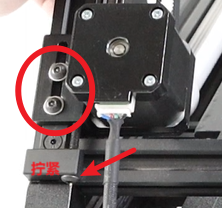
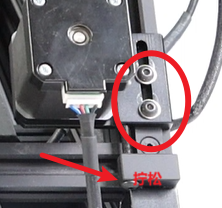
Stop the printing. While the xy motor is locked, pull the synchronous wheel in the direction indicated by the picture.
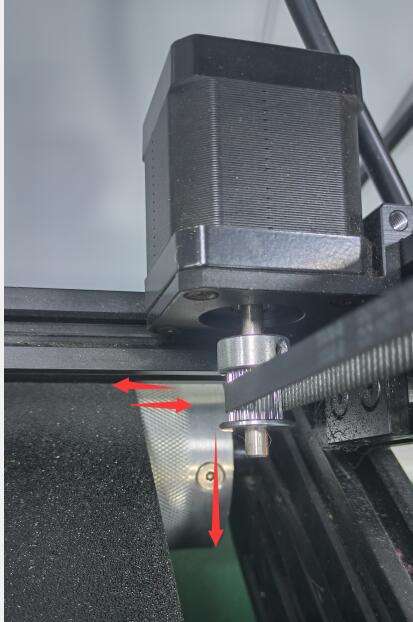
Check if the synchronous wheels are loose. If so, loosen the silver version of the synchronous wheels and reposition them to the correct installation location.
Left side 6.5mm
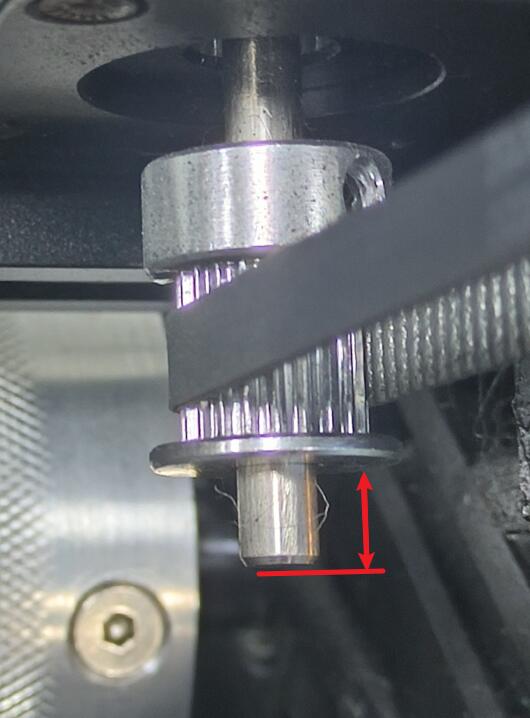
Right side 11.2mm
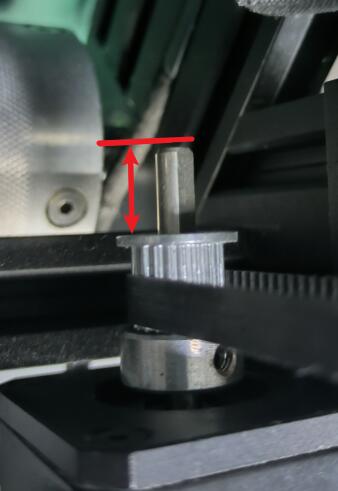
Align the slot and then tighten the Set screw.
The black version of the synchronous wheel needs to be replaced along with the motor. -
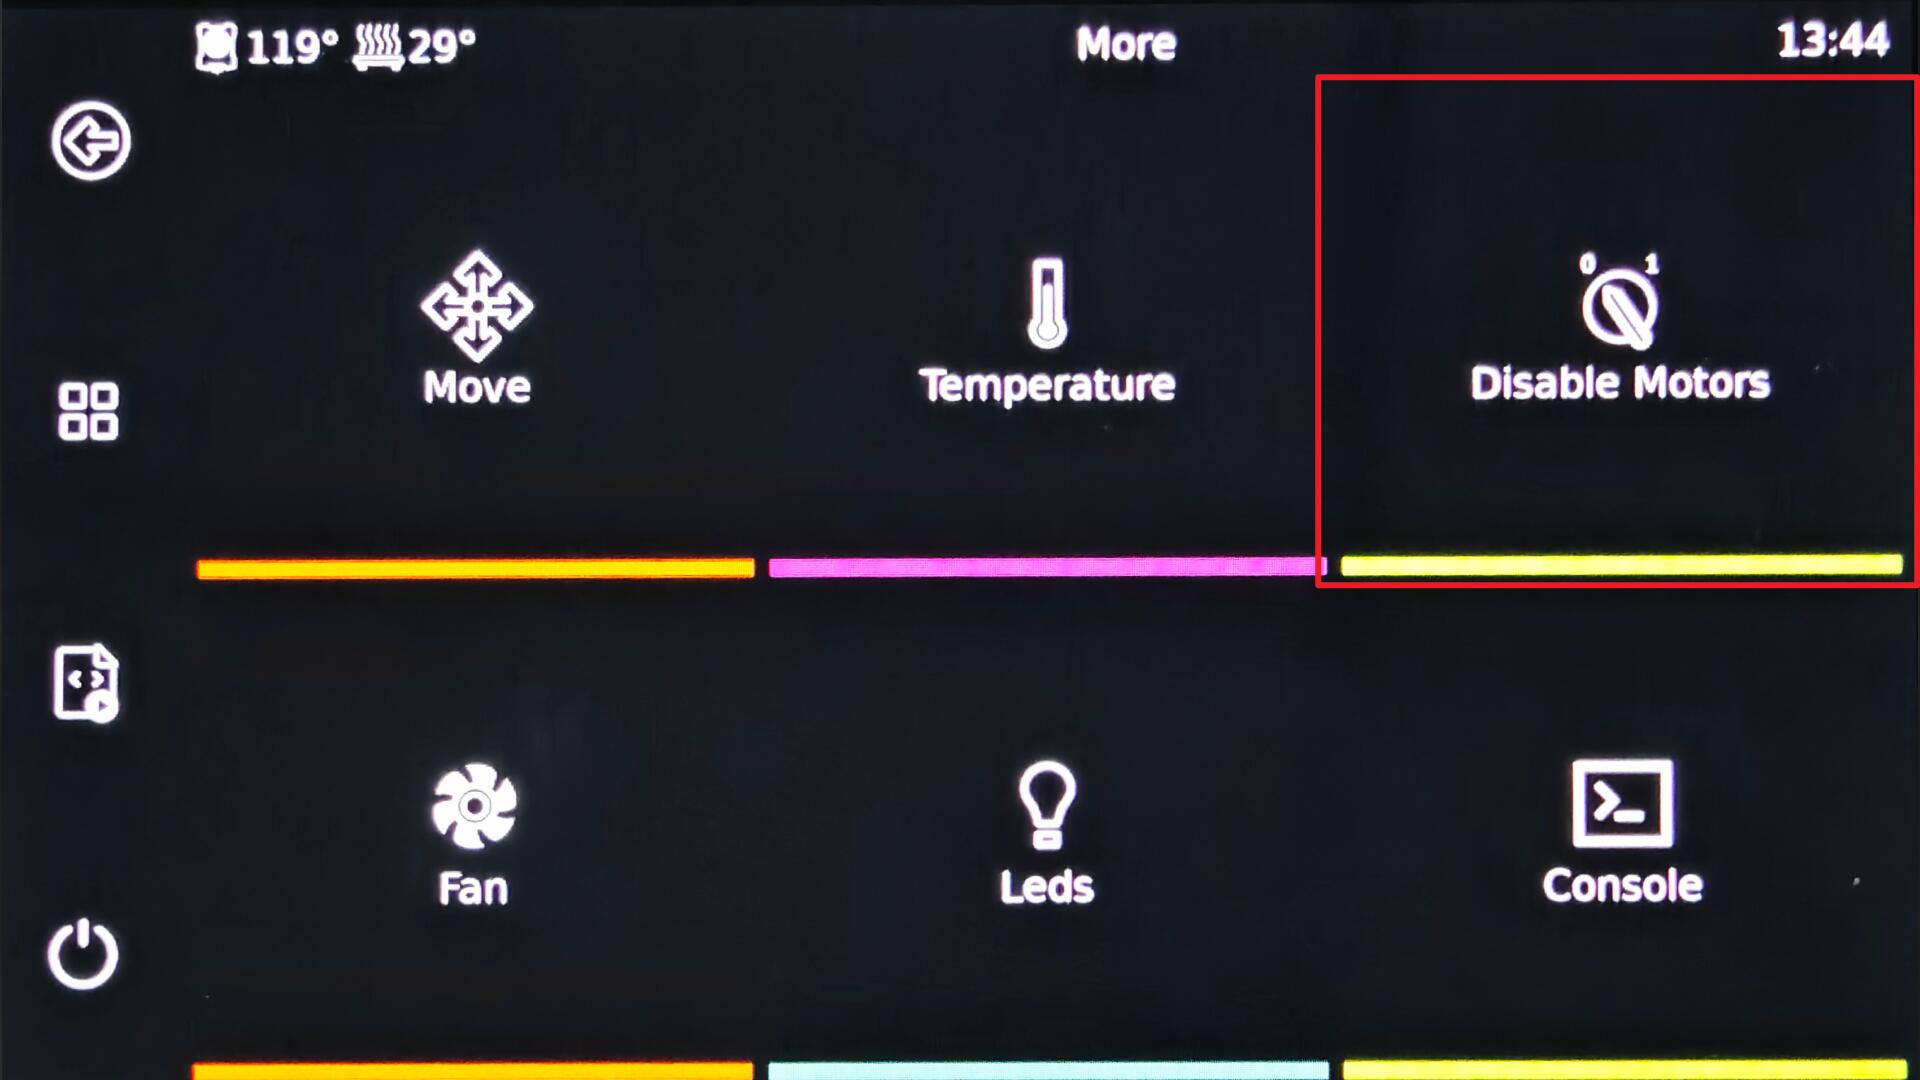
If none of the above situations apply, click “disable motors” on the screen.
Pull the print head manually along the x-y axis to see if it moves smoothly. If it doesn’t move smoothly, first check the tightness of the synchronous belt. It should not be too loose or too tight. If it is too loose or too tight, the tightness of the synchronous belt needs to be adjusted.
Carry out lubrication maintenance on the x-axis optical axis and y-axis guide rails.Cleaning and Maintenance of the XY Axis Guide。
¶ Fourth.The conveyor belt is not rotating.
-
Click “Disabled Motors” on the screen, then try to rotate the conveyor belt with both hands to see if it can be moved.

-
If the conveyor belt can rotate, it indicates that there is a fault with the z-axis motor or the wiring. In this case, replacement or repair is necessary. On the contrary, if the belt is too tight or is stuck by something, it means there is a problem with the belt.
-
Press the two ends of the conveyor belt with your hands. The conveyor belt will be depressed with elasticity. If the conveyor belt is too tight, you need to adjust the tension of the belt again. Reference Conveyor belt Correction Guide,Make sure that the conveyor belt is not installed too tightly.
-
Disconnect the power supply of the printer, place the machine sideways, and tap the bottom of the conveyor belt with your hand to check if any debris has fallen out, or check if the rollers on both sides of the conveyor belt are caught in any debris.
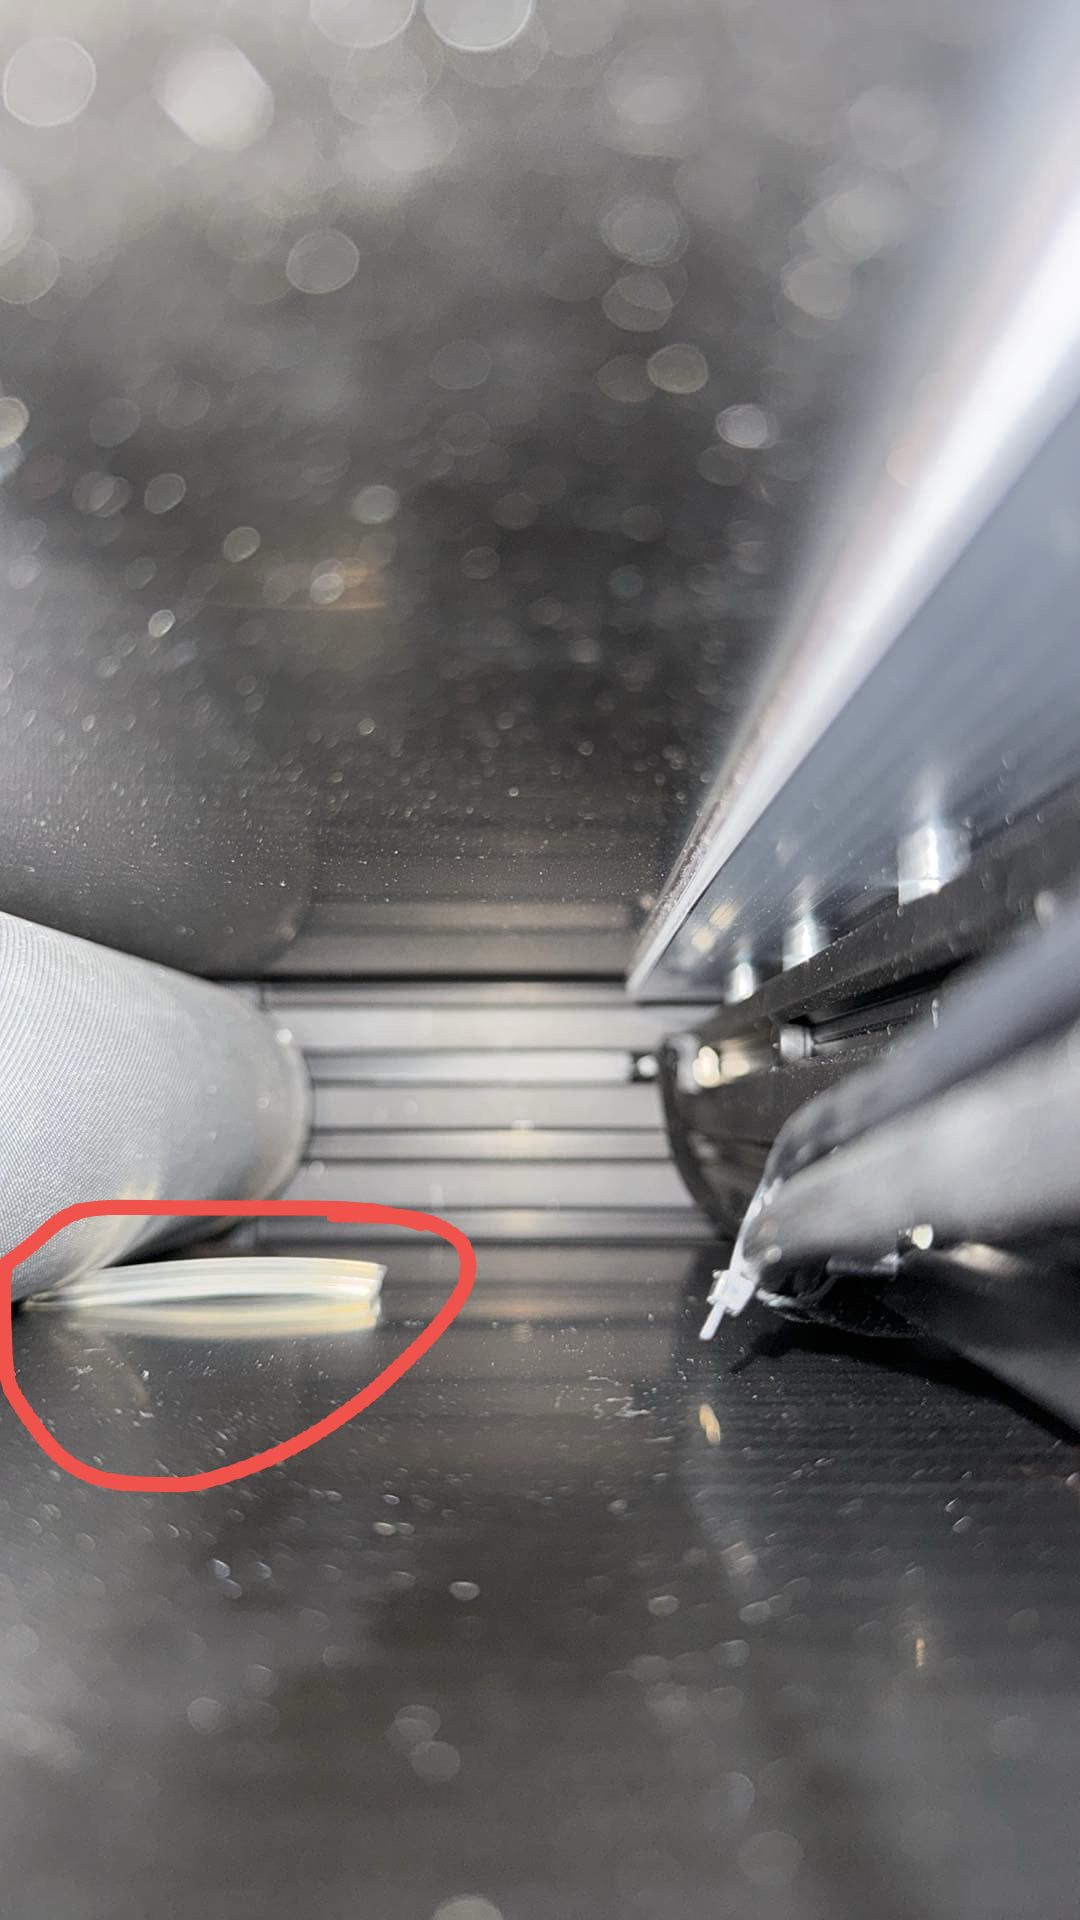
Just remove any debris and it will be fine.
¶ Fifth. Cannot power on
- The screen doesn’t light up when turning on the device. Make sure the power cord is properly connected and then check if the light on the back of the screen is flashing.
When the screen light is not on, check if there is a light on at the toolhead area.
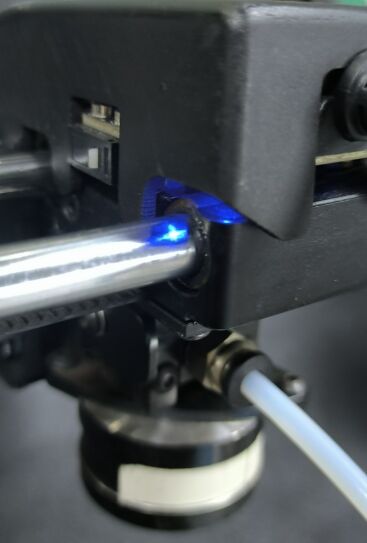
When the light at the toolhead is not on, check if the power switch is illuminated.
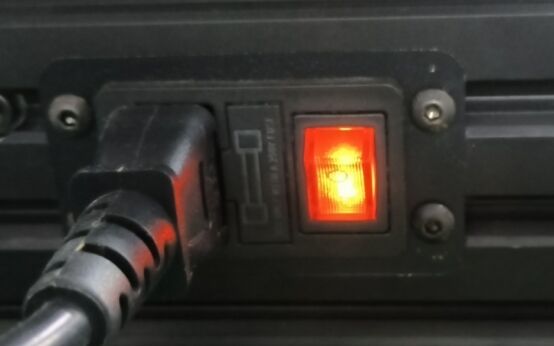
- If the light is on at the power switch, it may indicate that the lower-level machine motherboard or power supply is damaged. Please contact the customer service staff to determine which component is faulty and then proceed with the replacement.
- When the light at the power switch does not illuminate either, use a multimeter to test whether the power line is conducting and if there is any damage. If the line is damaged, replace it; if there is no damage, then replace the power switch.
- If the toolhead light is on but the screen backlight is not, then check if the SD card is inserted on the side of the screen.(The old version used to mount the printer system for SD cards. In the new version, emmc is used instead and no checks are required.) Make sure that both ends of the USB-type-C cable are properly connected. Try plugging and unplugging the cable again and then attempt to turn on the device. See if it can be powered on.
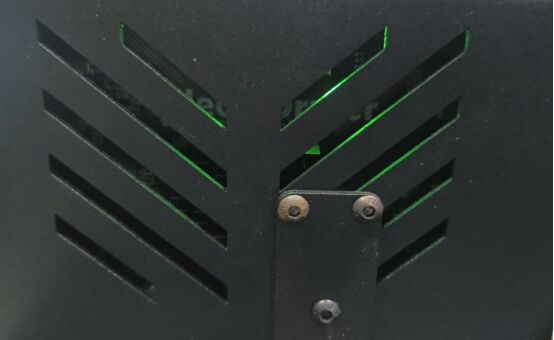
- If the green light flashes behind the screen but the screen itself is not illuminated, it may be that the LCD screen or the back panel of the display is damaged. In this case, please contact the customer service for determination of which component is damaged and then proceed with replacement. If the red light flashes, it may be a system failure. In this case, you need to re-write the img image refer to the Guide for burning the img image and try to boot up.